- Site Preparation
- Installation of the SPTD on
- Varian 3400
- HP 5890 and Other GCs
Careful adherence to these installation instructions should allow the user to install the SPTD. system on the Varian 3400 gas chromatograph. Be certain that you read through the instructions completely and acquire all the tools required before proceeding. The section on site preparation found in this manual should also be read through completely to be sure that you are ready for installation.
For further help in installation call
S.I.S. customer support at
contact us
The entire S.P.T.D. system can be installed by the end user. However, Scientific Instrument Services also provides installation by S.I.S. qualified staff. This includes installation of the Short Path Thermal Desorption on your GC or GC/MS system and training to get you up and running with your new system. Price includes all travel and lodging and expenses for 1.5 days at your location. Please call S.I.S. for more details.
| Part No. | Description | Quantity In Stock |
Price EA |
Order |
|---|---|---|---|---|
| 782100 | On Site training and installation of TD-5 System, Includes 1 1/2 days on site, travel and all other expenses. (Continental US, except NJ & Eastern PA) | DISCONTINUED | --- | --- |
| * Call for availability. | ||||
|
|
||||
Installation of the SPTD System on the Varian 3400 GC
Unpacking
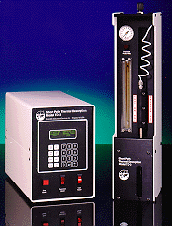
1. The following items should have been received with your shipment, and are required for installation of the Short Path Thermal Desorption (S.P.T.D.) System on the Varian 3400 GC. Be sure you have all the items before proceeding. If any items were not received with your system call S.I.S. immediately. See Figure 3.1 and Figure 3.2 to aid in determining that all items were received. Save all packaging material and boxes in case future factory service is required.
Fig. 3.1 The Short Path Thermal Desorption System for the Varian 3400 gas chromatographs. The system includes all items shown.
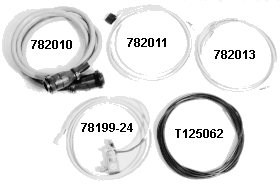
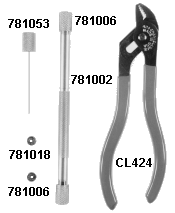
Fig. 3.2 Shows items included in SPTD Installation Kit #782200 for the Varian GC
Part # Description Qty.
Short Path Thermal Desorption Model TD3 #783000
783000D     S.P.T.D. Unit 1
783000C     S.P.T.D. Controller 1
783000M     S.P.T.D. Model TD3 Manual 1
783000N     S.P.T.D. Application Notes 1
782010      Interconnect Cable, 6 Ft. 1

Installation Kit #782200
781999-24   GC Carrier Gas Solenoid Valve 1
782011      Remote Cable for Varian 3400 1
781002      GLT Tube, 4mm ID 1
781006      SS Solid Caps for GLT Tube 2
781016      Graphite Needle Seal 1
781018      Graphitized Vespel® Needle Seal 1
781053      Needle Assy., 35mm Side Hole 1
CL424       Pliers 1
T125062     PTFE Tubing, 10 Ft. 1
782013      Remote Cable 2 1
The following tools are not included with the system, but required for system installation.
a. Tubing cutter for cutting 1/16 inch S.S. carrier gas line.
b. 5/16 inch wrench to tighten 1/16 inch Swagelok fittings.
c. 7/16 inch wrench to tighten 1/8 inch Swagelok fittings.
d. Snoop leak detection fluid
e. Scissors to cut PTFE tubing.
INSTALLATION OF THE SHORT PATH THERMAL DESORPTION SYSTEM ON THE VARIAN 3400 GAS CHROMATOGRAPH
NOTE: The S.P.T.D. must be utilized on the rear injection port of the Varian 3400 GC if more than one injection port is present.
CAUTION: Be sure all power to the gas chromatograph is off and unplug GC before proceeding.
3. Remove the covers of the gas chromatograph as shown in Figure 3.2 to gain access to the injection port.
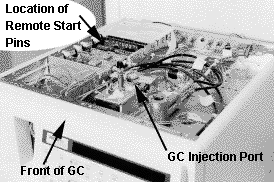
Fig. 3.2 Varian 3400 GC with covers removed
GC Carrier Gas Solenoid Valve Installation
NOTE: Installation of the GC Carrier Gas Solenoid (781999-24) is optional but is recommended. Please see GC Carrier Flow on page 7-1 of this manual for a discussion on the use of this valve. If you decide not to install this solenoid valve proceed to step 10.
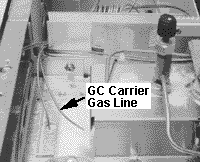
Fig 3.3 - Close up of Injection Port Area
4. There is a single 1/16 inch stainless steel gas line which enters the front of the injection port which provides the carrier gas. Verify that this is the carrier gas line by tracing the line back from the injection port to its source. The carrier gas line will eventually terminate at the carrier gas inlet for the gas chromatograph.
5. Turn off the carrier gas flow at its source.
6. Using the tubing cutter, cut the carrier gas line approximately 1-2 inches from the injection port. See Figure 3.4. Be sure that both ends of the carrier gas line where you have made the cut are open and clean, if not clean with a small needle file. Figure 3.5 shows the carrier gas line cut.
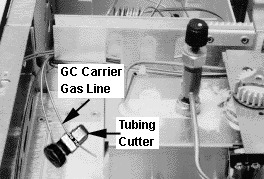
Fig. 3.4 Cutting the GC carrier gas line for installation of the carrier gas solenoid valve.
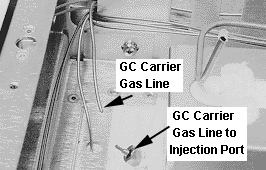
Fig. 3.5 The carrier gas line has been cut and is ready for installation of the carrier gas solenoid valve.
7. Determine the flow direction of the GC carrier gas solenoid valve (781999-24). There is an arrow on the side of the valve which notes the flow direction of the valve. Install the valve where you have just made the cut in the carrier gas line such that the outlet of the valve is towards the injection port of the GC. Install the valve in such a position that the valve will not interfere with the covers of the GC when they are replaced later. See Figure 3.6. Be sure the 1/16 inch SS line is completely seated in the Swagelok fittings on the solenoid valve. Tighten the fittings finger tight and then tighten 3/4 turn further with a 5/16 inch wrench. See Figure 3.7
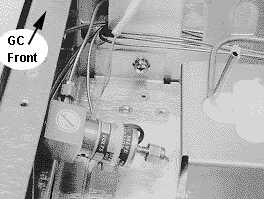
Fig. 3.6 Installing the GC carrier gas solenoid valve.
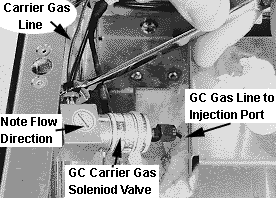
Fig. 3.7 The Swagelok fittings should be tightened 3/4 turns past finger tight using a 5/16" wrench.
8. Turn on the carrier gas flow again and check for leaks in these connections using Snoop. See Figure 3.8. If leaks occur re-tighten the fittings and leak check again.
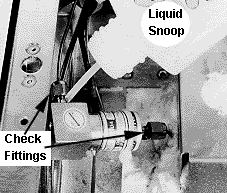
Fig. 3.8 Check for leaks at these fittings using SNOOP.
9. Feed the GC carrier gas solenoid valve electrical lead from the injection port to the rear of the GC. Keep the lead away from any hot surfaces. This line must exit through an opening in the back panel of the GC so that it can be plugged into the S.P.T.D. controller later. See Figure 3.9.
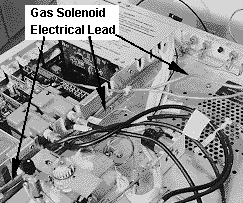
Fig. 3.9 The electrical lead from the GC carrier gas solenoid valve should be directed out through the back of the GC.
Installation of GC Remote Cable
10. With the covers still removed locate the pins for the remote cable installation on the GC control board. See Figure 3.10 and Figure 3.2 see information found in the Varian 3400 manual concerning installation of GC remote input cable.
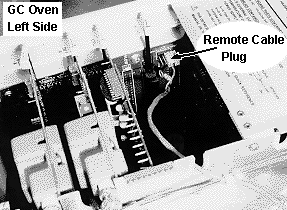
Fig. 3.10 The pins for the remote start on the Varian 3400 are located on the left side of the interior of the GC.
11. Plug the appropriate end of the remote cable (782011) onto the pins on the GC control board. See Figure 3.11. Feed the cable out to the rear of the GC so that it can be later plugged into the rear of the S.P.T.D. controller.
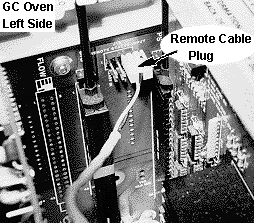
Fig. 3.11 The remote start cable has been installed. The lead should be directed out through the rear of the GC.
12. Replace all GC covers.
Installation of S.P.T.D. Unit
13. The S.P.T.D. unit is manufactured with a counterbore in the bottom of the unit which fits snugly over the GC septum nut on the Varian GC. See Figure 3.12. Place the unit over the septum nut so that the nut is fitted in this counterbore. See Figures 3.13 and 3.14. There are no clamps or other fittings required to mount the system to the GC.
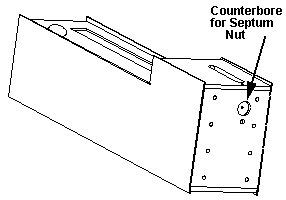
Fig. 3.12 Schematic shows the counterbore which fits over the GC septum nut on the Varian 3400.
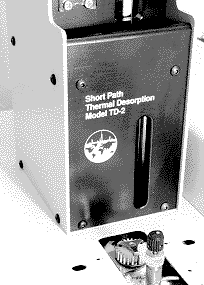
Fig. 3.13 Align the SPTD unit over the septum nut.
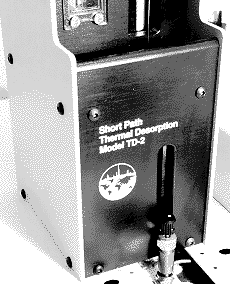
Fig. 3.14 The SPTD fits snugly over the septum nut.
14. The back of the S.P.T.D. unit has two 1/8 inch Swagelok fittings for connection of the carrier gas and the air which is used to operate the S.P.T.D. system. They are labeled GAS for the carrier gas and AIR for the compressed air. See Figure 3.15.
NOTE: For more discussion on the gas line setup and installation see the Site Preparation section of this manual.
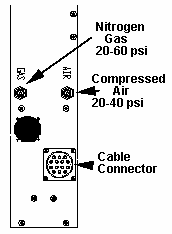
Fig. 3.15 Schematic shows the location of the gas inlets on the rear of the SPTD unit.
15. Using the 1/8 inch PTFE tubing supplied with the S.P.T.D. system cut a length of tubing with the scissors long enough to reach from the tee or cross which was installed in the GC carrier gas line during site preparation to the fitting labeled GAS. Fully seat the tubing in the fittings and then tighten the fittings finger tight. Using a wrench tighten the fittings 3/4 turns further.
WARNING: Do not use Hydrogen as a carrier gas in this system. Keep PTFE tubing lines clear of GC exhaust fan and other heated areas.
16. As before, cut an appropriate length of the 1/8Ó PTFE tubing supplied with the S.P.T.D. to connect from the compressed air source to the fitting labeled AIR. Be sure the tubing is fully seated in the fittings and then tighten the fittings finger tight. Using a 7/16" wrench tighten the fittings 3/4 turns further. See Figure 3.16.
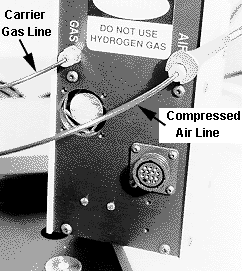
Fig. 3.16 1/8" PTFE tubing is used for the carrier gas and compressed air lines on the SPTD unit.
17. Using Snoop, check for leaks at these connections.
18. Plug the interconnect cable (782010) into the appropriate plug on the back of the desorption unit. The cable is reversible so either end can be plugged into the unit. See Figure 3.17.
Installation of the S.P.T.D. Controller
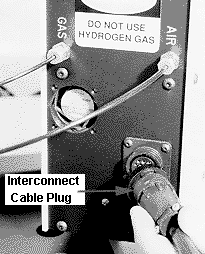
Fig. 3.17 Installation of the interconnect cable (782010) on the rear of the SPTD unit.
Installation of S.P.T.D. Controller
19. The S.P.T.D. controller (783000C) can be positioned next to the unit as shown in Figure 3.18 or can be positioned on the bench next to the GC. Figure 3.19 shows the back of the controller.
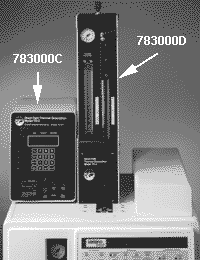
Fig. 3.18 The SPTD unit installed on the Varian 3400. The SPTD controller fits well next to the unit.
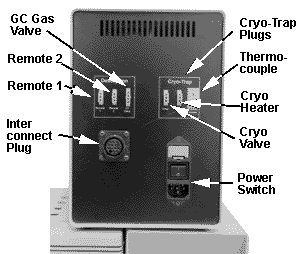
Fig. 3.19 Rear view of the SPTD controller (783000C).
20. Plug the interconnect cable (782010) into the appropriate connection on the back of the controller. See Figure 3.20.
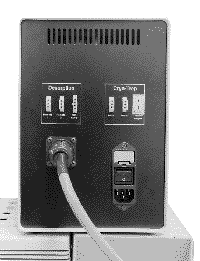
Fig. 3.20 Installing the interconnect cable (782010).
21. The cable from the GC carrier gas solenoid valve (781999-24), if it was installed earlier, should be plugged into the fitting labeled GC GAS on the back of the S.P.T.D. controller. See Figure 3.21.
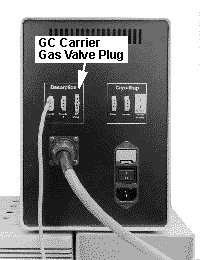
Fig. 3.21 Plug the remote start cable into the plug labeled "Remote 1" on the rear of the SPTD Controller.
22. The remote cable (782011) should be plugged into the fitting labeled Remote 1 on the back of the S.P.T.D. controller. See Figure 3.22.
NOTE: The plug labeled Remote 2 is available for starting recorders, integrators or other equipment.
23. Plug in the power cord from the back of the S.P.T.D. controller into a grounded 115V, 10 Amp outlet.
24. Installation is now complete. Refer to the operator section of this manual for proper use and operation of the SPTD system.
25. If the GC Cryo-Trap accessory was purchased with the SPTD system the GC cooling valve, cryo heater and thermocouple are plugged in the appropriate receptacle in the back of the controller box. See Section IX (Accessories) for details on the Cryo-Trap installation.


