- ▶
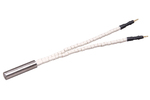
- Heaters/Source
- ▶
- Agilent Heaters and SensorsMass Spectrometry, Scientific Supplies & ManufacturingScientific Instrument Services 5973 Source Heater Tamper Resistant Allen Wrench 5973/5975 Quad Sensor 5985 Source Heater Assembly Agilent Interface Heater Assembly 5971 Interface Heater
- ▶
- Reference Material on InstrumentationArticle - A High Temperature Direct Probe for a Mass Spectrometer Design of a Direct Exposure Probe and Controller for use ona Hewlett-Packard 5989 Mass Spectrometer SIS AP1000 AutoProbe™ SIS AP2000 AutoProbe™ - Description of System HPP7: Direct Probe Electronics Console HPP7: Direct Probe for the Agilent (HP) 5973/5975 MSD HPP7: HP Direct Probe Application Notes HPP7: Installation Directions for the Direct Probe HPP7: Side Cover for the HP 5973 MSD HPP7: Support HPP7: Probe Inlet System for the Agilent (HP) 5973 and 5975 MSD with Automatic Indexed Stops HPP7: Theory of Operation of the Direct Probe and Probe Inlet System Direct Thermal Extraction Thermal Desorption Application Notes Environmental Thermal Desorption Application Notes Food Science Thermal Desorption Application Notes Forensic Thermal Desorption Application Notes GC Cryo-Trap Application Notes Headspace Application Notes Purge & Trap Thermal Desorption Application Notes Theory of Operation of the AutoDesorb® System AutoDesorb Notes for SIS Dealers Adsorbent Resin Application Notes Installation of the Short Path Thermal Desorption System on Agilent (HP) and Other GCs Installation of the Short Path Thermal Desorption System on a Varian 3400 GC AutoDesorb® System Development Team Thermal Desorption Applications and Reference Materials Installation of the Short Path Thermal Desorption System - TD5 Part I - Design & Operation of the Short Path ThermalDesorption System Installation Instructions for the Model 951 GC Cryo-Trap on the HP 5890 Series GC Installation Instructions for the Model 961 GC Cryo-Trap on the HP 5890 Series GC Operation of the Model 951/961 GC Cryo-Trap SIS GC Cryo Traps - Theory of Operation NIST/EPA/NIH Mass Spectral Enhancements - 1998 version (NIST98) SIMION 3D Ion Optics Class Mass Spectrometer Source Cleaning Methods MS Tip: Mass Spectrometer Source Cleaning Procedures Mass Spec Source Cleaning Procedures Micro-Mesh® Abrasive Sheets Research Papers Using New Era Syringe Pump Systems EI Positive Ion Spectra for Perfluorokerosene (PFK) Cap Liner Information How do I convert between fluid oz and milliliters? Which bottle material should I choose? Which bottle mouth should I choose? The Bottle Selection Guide CGA Connections for Gas Tanks Chemical Reaction Interface Mass Spectrometry (CRIMS)

- LiteratureApplication Notes Adsorbent Resins Guide Mass Spec Tips SDS Sheets FAQ MS Calibration Compound Spectra Manuals MS Links/Labs/ Organizations MS Online Tools Flyers on Products/Services Scientific Supplies Catalog About Us NextAdvance Bullet Blender® Homogenizer Protocols Micro-Mesh® Literature Instrumentation Literature Agilent GC/MS Literature SIS News / E-Mail Newsletter NIST MS Database - Update Notifications
- ▶
- MS Tip: Mass Spectrometer Source Cleaning Procedures (This Page)
Revised 6/1/02
Copyright: Scientific Instrument Services, June 2002, All rights reserved
by John J. Manura, Scientific Instrument Services, Ringoes, NJ
The following is a compilation of the procedures used by Scientific Instrument Services for the cleaning of mass spectrometer sources over the last 25 years. This article incorporates the current techniques used at SIS as well as procedures reported in our Mass Spec Handbook of Service (published in 1983 and now out of print), articles published in back issues of the "Mass Spec Source Newsletter" as well as application notes published on the SIS web site (http://www.sisweb.com). These methods have been tested and modified over the years with the availability of new equipment and with the input from many other mass spectrometer users. In addition we have included several alternative techniques for the same operation, when these methods have been recommended by the instrument manufacturers. As a result this article provides for a comprehensive resource of techniques and methods for the cleaning of mass spectrometer sources for most mass spectrometers.
This article covers the general service and cleaning of the mass spectrometer sources for a wide range of instrument models but may not be all inclusive. Most, but not all, of the metal parts in a mass spectrometer source can be cleaned by the following techniques.
When cleaning a mass spectrometer source, there may be components that cannot be cleaned or that must be handled carefully and without the use of any abrasive cleaning tools. Items such as alumina coated metal parts, gold plated parts, ceramic insulators, O Rings, Vespel® insulators and other polymer components must be handled and cleaned by techniques which will not damage these components. Cleaning methods for these components are discussed at the end of this article. In addition, the specialized methods outlined in the instrument manufacturers' manual may have notes on how to handle these components. Check your instrument manufacturers' manuals for specific information on the cleaning of the mass spectrometer source and take note of parts which require special handling or alternative cleaning methods.
There is no regular schedule for cleaning the mass spectrometer source. The source should be cleaned when the mass spectrometer symptoms indicate that the source is contaminated. These symptoms include poor sensitivity, loss of sensitivity at high masses, or high multiplier gain during an auto tune.
The cleaning and service of the mass spectrometer source begins with the removal of the source from the vacuum housing, followed by disassembly, cleaning and polishing, washing and finally reassembly and testing. The various steps are outlined below and this article follows this general outline.
General Outline for the Cleaning of a Mass Spectrometer Source
-
Disassembly
-
Cleaning Techniques for Metal Parts
-
Cleaning and Polishing of Metal Parts
-
Cleaning with motorized buffing tools
-
Cleaning with Abrasive Cloths
-
Cleaning with Abrasive Powders
-
Sandblasting
-
Washing Procedures
-
Bake out and Drying
-
-
Cleaning Ceramic Insulators
-
Abrasive Cleaning
-
High Temperature Bake out of Ceramics
-
-
Cleaning Vespel parts, O Rings and other polymers
-
Reassembly
-
Filament Installation and Alignment
-
Testing
I. Disassembly
Tools Required
Screwdrivers (a variety depending on the instrument, i.e. Jewelers, slotted, phillips, etc.)
Small Pliers
Tweezers
Cleaning Cloths
Lint free gloves
Removal of the Mass Spectrometer Source from the Mass Spectrometer
This operation begins with the shutdown and venting of the mass spectrometer vacuum system. The mass spectrometer vacuum chamber must be at atmospheric pressure before the vacuum housing can be opened and the mass spec source removed.
Depending on the manufacture and design of the mass spectrometer source and mounting system, the removal of the mass spec source from the vacuum housing can be easy or quite difficult. The difficulty usually occurs due to plumbing and electrical wiring of the source. For these difficult situations it is often advisable to check the manufacturers' manual to make sure that there are detail directions, schematics or photographs to demonstrate the removal process. If these are not available, it is advisable to take photographs of the source and mounting before you begin.
After the source has been removed from the mass spectrometer, it should be placed on a clean lint free cloth for the source disassembly operations.
Disassembly of the MS Source
After the source has been removed from the mass spectrometer it must be disassembled before cleaning is started. Again check the manufacturers' manuals for detailed drawings or pictures of the source assembly and disassembly. If this information is not available, then you should take pictures of the source before disassembly begins and at the various stages of disassembly. At SIS we often are asked to clean a source that is quite complicated. Before we begin we take digital photographs of the source from various angles and take additional photographs during the disassembly process. These color photographs have proved quite valuable when reassembling the sources. In the photographs pay particular attention to electrical wire hookups and the orientation of parts on the source block. Also take note of the magnets and the orientation of the magnet poles on the source block. During the disassembly process, make notes on the photographs or drawings as needed. These precautions will save a lot of time in the future.
Normally disassembly begins with removing electrical wire leads and connectors. Often the mass spec source can be removed from its mount by just disconnecting the electrical leads at the source itself. This is preferable since the lead will not need to be completely removed and its orientation and location will not be changed when the source is ready to reassemble. At other times it is necessary to completely remove the leads. If this is necessary, it is important to note the location of each lead as well as its orientation so that it can be put back in the same relative position when the source is reassembled.
If the manufacturer has disassembly instructions in the manual, they should be followed, otherwise parts are normally removed in a logical sequence from the outside to the inside. Use care in removing screws so as not to damage the screw head slots. If a screw is tight or frozen in position, do not force it. In this case other techniques may help such as the use of penetrating oil, putting the part with the frozen screw into an ultrasonic cleaner or heating the parts to try to unstick the screw. If a screw breaks off in the source block, it may not be repairable and a new source block may need to be purchased. The instrument shops at SIS have had some success in removing broken screws for our customers - so you can try us if you have no other alternative.
As the parts are disassembled, place the metal parts which will be abrasively cleaned in one beaker and the other parts such as ceramics, insulators, plastic parts and other parts which cannot be polished in a separate beaker.
II. Cleaning Techniques for Metal Parts
The purpose of cleaning the mass spectrometer source is to remove deposits and contamination that can interfere with the mass spectrometer performance and prevent it from operating at optimum performance and sensitivity. The amount and degree of cleaning depends on the construction material of the source parts and their degree of contamination.
| Part Types | Cleaning Methods |
| Stainless Steel Parts |
|
| Ceramic Insulators | Sandblasting, Acid Washing, Solvent Cleaning, Bake out |
| Berilium Oxide Insulators | Solvent wash followed by low temperature bake out |
| Oxide coated metal parts | Solvent wash followed by low temperature bake out |
| Macor Ceramics | Solvent wash followed by low temperature bake out |
| Vespel Insulators | Solvent wash followed by low temperature bake out |
| Gold Plated Parts | Solvent wash followed by low temperature bake out |
| O Rings | Solvent wash followed by low temperature bake out |
| PRT & Thermocouples | Low Temperature bake out |
A number of techniques are available for the cleaning of the metal source parts. At SIS we have used a combination of polishing with motorized power tools and hand polishing with Micro Mesh abrasive sheets. For parts that may have stubborn deposits, we often use small sandblaster with glass beads abrasives (but this is not normally needed). Other abrasive sheets have also been used (such as those sold by Agilent), but the Micro Mesh products are a finer grit and produce finer finishes on the stainless steel parts.
Parts of the source that come in contact with the sample or ion beam should be thoroughly cleaned as described below. However surfaces that do not come into direct contact with the sample (such as the source mounting brackets) do no normally need to be cleaned to the same extent, unless the contamination can contribute to the contamination of the source when it is reinstalled into the mass spectrometer. Normally just rinsing in solvent and drying is all that is required of these less critical components.
II. A. a. Cleaning with Motorized Buffing Tools
Tools Required
Supplies listed previously
Dremel Moto-Tool
Flt Buffing wheels
Polishing compound
Polishing and buffing stainless steel parts with a motorized buffing wheel is a quick and effective method for cleaning the residues off the stainless steel source parts and restoring the metal finish to a bright mirror finish. In our labs we have used the Dremel Moto-Tool, The Foredom Motor Tool and a small bench mounted buffing wheel. The Dremel Moto-Tool is a good choice for the laboratory because it can have many other applications in the instrument laboratory. Parts cleaned by the following techniques will be highly polished and will be free from fine scratches, which collect contamination rapidly and necessitate frequent cleaning. The initial cleaning may involve much time and effort. However the metal surfaces will stay cleaner longer (since the fine scratches in the metal surface which collect contamination are absent) and future cleaning will be much faster and easier.
The Dremel Moto-Tool is normally used with small felt buffing wheels mounted on a small mandrel. Polishing speed of 20,000 to 30,000 rpm are normally used for polishing parts. The buffing wheels are available in a number of shapes including 1" diameter disks, 1/2" diameter disks and small pointed cylinders for getting into corners. A fine metal finishing abrasive is used with the felt buffing wheel. The Dremel polishing rouge is a good general buffing abrasive, but other buffing abrasives are available from your local hardware store. Apply the abrasive paste in a thin film on the felt buffing wheel. Polish thoroughly to remove all carbon residues and scratches. When buffing parts, take care not to force the part into the buffing disc. Let the wheel and the abrasive do the work. When the cleaning appears to slow down, add more abrasive to the sheel. Polish the metal to a high luster. The more you polish, the more of a mirror like finish you will obtain.
II. A. b. Cleaning with Abrasive Cloths
Tools Required
Supplies listed previously
Micro Mesh abrasive cloths
Micro Mesh polishing board
The shops at SIS have been using Micro Mesh abrasive cloths and polishing boards for many years to clean and polish the stainless steel source parts. The Micro Mesh is a cushioned abrasive on which the abrasive crystals float rather than remain in a fixed position on its backing. As a result the surfaces of the materials being cleaned will have minimal surface scratches from the abrasive as compared to other abrasive materials. The four finest grits (4000, 6000, 8000 and 12000) are normally all that is required for mass spec source cleaning. Use the courser grits to remove the carbon residue from the source and then use the next finest grit until you finish the source cleaning with the 12000 grit Micro Mesh. Using this product in this step like manner will produce a mirror like surface much like buffing above. The abrasive sheets can be cut into smaller pieces or folded to various shapes to fit the contour of the item being polished.
The Micro Mesh polishing boards are good for cleaning slits. Hold the slit perpendicular to the board while polishing. This will clean the slit edge, without rounding the edges of the slits.
II. A. c. Cleaning with Abrasive Powders
Tools Required
Supplies listed previously
Aluminum Oxide abrasive (600 mesh)
Cotton swabs
Some of the instrument manufacturers recommend cleaning the source using an abrasive aluminum oxide powder. SIS sells a 600 grit aluminum oxide abrasive for this purpose. Use an abrasive slurry of the aluminum oxide abrasive with methanol or water. Cotton swabs work quite well with this abrasive slurry. These small cotton swabs enable the cleaning of corners inside the mass spec source. The only disadvantage of this product is that it is more abrasive than the previous techniques and the finished surface will not have a high metal luster. Courser abrasives are not recommended for cleaning mass spectrometer sources.
II. A. d. Sandblasting
Tools Required
- Supplies listed previously
- Miniature Sandblasterwith exhaust system
- Aluminum oxide abrasive, 400 grit
On occasion we have used miniature sandblasters to clean mass spectrometer sources. Normally glass beads abrasives are used at low pressures to remove stubborn residues from metal parts. Sandblasting is not normally used on the source stainless steel parts (and should never be used on source slit edges). However sandblasting works quite well in removing baked on carbon stains on metal surfaces and is frequently used to clean the ceramic insulators from the mass spec source. Several pieces of equipment for this purpose are described in the SIS catalog. (See the Miniblast Sandblaster and Air Eraser products in the SIS catalog).
II. B. Washing Procedures
Tools Required
Supplies listed previously
Variety of glass beakers
Ultrasonic Cleaner
Detergent (Alconox or Mr. Clean)
Water or other solvents as required
After the metal parts have been cleaned and polished by the above procedures, they must be cleaned to remove all trace residues of the buffing compounds and abrasive materials. Normally solvents are used for this purpose. In the past many manufacturers have recommended the use of chlorinated solvents and toluene for this purpose. However we do not think that these solvents are necessary. The following procedure is used at SIS for washing instrument parts after cleaning. Below are listed some the solvent rinsing sequences reported by various manufacturers during the last 25 years
Industry recommended solvent washing sequences
| SIS | Agilent | Thermo-Finnigan | Dupont |
| Mild Detergent | Methylene Chloride | Water | Water |
| Water | Acetone | Methanol | Isopropylalcohol |
| Acetone | Methanol | 1,1,1-Trichloroethane | Toluene |
| Methanol | Ethyl Ether |
First the parts are washed in an ultrasonic cleaner in water with a detergent. We have used both Alconox and the commercial cleaner Mr Clean for this purpose. The purpose of the first cleaning with detergent is to remove the buffing compound residues and other oil residues from the cleaning process. A toothbrush with the detergent solution can be used initially to remove the heaviest deposits of abrasive cleaning compounds. The parts are put in the ultrasonic cleaner and sonicated for at least two minutes. Repeat this process with several new solutions of the detergent until the parts are clean. Then wash the parts several times in the ultrasonic cleaner with clean water until no soap residues are present. Finally rinse the parts in Acetone to remove all water residues and do a final rinse in Methanol.
II. C. Baking and Drying
Tools Required
Supplies listed previously
Laboratory Oven
Gloves or tweezers
After the parts have been washed they are normally baked out in a laboratory oven at 100 to 150 degrees C for at least 15 minutes. If properly cleaned the parts should have no residues of cleaning materials and be spot fee. After the parts are allowed to cool they should not be touched with the bare hand. Use nylon or cotton gloves, lint free cloths and tweezers to handle all clean parts.
When the parts are finished they should be placed on a clean lint free cloth and proceed with the assembly operations.
III. Cleaning Ceramic Insulators
III. A. Abrasive Cleaning
Tools Required
Supplies listed previously
Miniature Sandblaster with exhaust system
Aluminum oxide abrasive, 400 grit
The preferred method for cleaning alumina ceramic source insulators at SIS, is to first sandblast the ceramics using 400 grit aluminum oxide abrasive in a miniature sandblaster. This technique will normally remove most carbon residues. After sandblasting, the parts should be blown off thoroughly to remove any abrasive residues and then rinsed in an Acetone bath. It is not recommended that ceramic insulators be cleaned in an ultrasonic cleaner since this may damage them. Finally the ceramic insulators are baked out in an oven at a temperature of at least 150 degrees C. Because ceramics can adsorb solvents more readily than metal parts, they should be baked out for at least 30 minutes at 150 degrees C.
When the parts are cool, they should be removed from the oven and placed on a clean lint free cloth.
III. B. High Temperature Bake Out of Ceramics
Tools Required
Supplies listed previously
Muffle Furnace
Miniature Torch
Another technique often used to clean ceramics is by baking them out in a muffle furnace at a temperature where they just begin to glow (about 1000 degrees C) This will burn off any carbon residue. We have also cleaned ceramics by just heating with a miniature torch to accomplish the same results, but be careful to heat and cool the ceramics slowly with this technique so as not to produce a high thermal shock to the ceramics which will cause them to crack.
Other manufacturers have recommended cleaning of ceramics using a dichromate solution (which will turn the ceramics green in color) or by immersing in Nitric acid or aqua regia. We do not recommend either of these methods due to the hazards involved in handling these chemicals.
Cleaning Vespel parts, O Rings and other polymers
Tools Required
Supplies listed previously
Glass laboratory beakers
Untrasonic Cleaner
Solvents - Methanol
Some of the parts in the mass spec source may include polymers and cannot be cleaned by any of the above procedures. Normally these parts are cleaned by immersing in Methanol in an ultrasonic cleaner for several minutes. Following this cleaning, the parts are put into an oven and baked out at 100 to 150 degrees C for at least 15 minutes. If this does not clean the parts, they will probably need to be replaced.
V. Reassembly
Tools Required
Supplies listed previously
After all the parts are cleaned and baked out, the source should be assembled in the reverse order that it was assembled. Be sure to use nylon gloves and tweezers to handle all parts. Do not touch them with your bare hands. Assemble source on a clean lint free cloth. Assembly is always more challenging than the disassembly operation. It requires some dexterity and a good deal of patience to handle small screws and the source parts using tweezers and the jewelers screwdrivers. Use care to tighten all parts securely, but do not over tighten the screws as you may damage the screw head slots or make it impossible to remove these screws in the future.
VI. Filament Installation and Alignment
Tools Required
Supplies listed previously
The installation of the filaments and heaters is normally the last step before the source is installed back into the mass spec vacuum system. If the mass spec has a collector, it is often best to install the filament before the collector. One can then check the filament alignment by looking thought the ion exit hole where the collector would normally be. This is the optimum way to make sure the filament is perfectly aligned in the source.
VII. Testing
Tools Required
Volt Ohm Meter
After the source as been completely reassembled and the electrical leads installed. The components should be checked for continuity and leaks. The following components are normally checked with a volt-ohm meter using the resistance scale.
Resistance across the filament - normally 1 - 3 ohms (check your manual)
Source Heater - Normally 10 to 100 ohms (check your manual)
Thermocouple Leads - Normally 1 - 3 ohms
PRT Leads - Normally 100 ohms
Filament to Source Block - Infinite resistance
Collector to Source Block - infinite resistance
Check all lenses to Source Block - normally infinite resistance (check your manual)
After all testing is complete the source can be reinstalled into the MS vacuum housing. After installation the above readings can again be checked at the lead ends where they exit the vacuum chamber. This will assure that the leads are properly connected.