- ▶
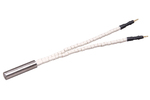
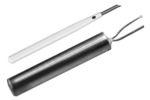
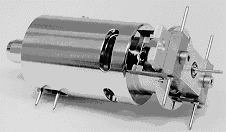
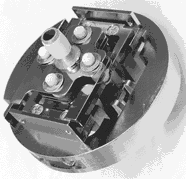
- Heaters/Source
- ▶
- Agilent Heaters and SensorsMass Spectrometry, Scientific Supplies & ManufacturingScientific Instrument Services 5973 Source Heater Tamper Resistant Allen Wrench 5973/5975 Quad Sensor 5985 Source Heater Assembly Agilent Interface Heater Assembly 5971 Interface Heater
- ▶
- Reference Material on InstrumentationArticle - A High Temperature Direct Probe for a Mass Spectrometer Design of a Direct Exposure Probe and Controller for use ona Hewlett-Packard 5989 Mass Spectrometer SIS AP1000 AutoProbe™ SIS AP2000 AutoProbe™ - Description of System HPP7: Direct Probe Electronics Console HPP7: Direct Probe for the Agilent (HP) 5973/5975 MSD HPP7: HP Direct Probe Application Notes HPP7: Installation Directions for the Direct Probe HPP7: Side Cover for the HP 5973 MSD HPP7: Support HPP7: Probe Inlet System for the Agilent (HP) 5973 and 5975 MSD with Automatic Indexed Stops HPP7: Theory of Operation of the Direct Probe and Probe Inlet System Direct Thermal Extraction Thermal Desorption Application Notes Environmental Thermal Desorption Application Notes Food Science Thermal Desorption Application Notes Forensic Thermal Desorption Application Notes GC Cryo-Trap Application Notes Headspace Application Notes Purge & Trap Thermal Desorption Application Notes Theory of Operation of the AutoDesorb® System AutoDesorb Notes for SIS Dealers Adsorbent Resin Application Notes Installation of the Short Path Thermal Desorption System on Agilent (HP) and Other GCs Installation of the Short Path Thermal Desorption System on a Varian 3400 GC AutoDesorb® System Development Team Thermal Desorption Applications and Reference Materials Installation of the Short Path Thermal Desorption System - TD5 Part I - Design & Operation of the Short Path ThermalDesorption System Installation Instructions for the Model 951 GC Cryo-Trap on the HP 5890 Series GC Installation Instructions for the Model 961 GC Cryo-Trap on the HP 5890 Series GC Operation of the Model 951/961 GC Cryo-Trap SIS GC Cryo Traps - Theory of Operation NIST/EPA/NIH Mass Spectral Enhancements - 1998 version (NIST98) SIMION 3D Ion Optics Class Mass Spectrometer Source Cleaning Methods MS Tip: Mass Spectrometer Source Cleaning Procedures Mass Spec Source Cleaning Procedures Micro-Mesh® Abrasive Sheets Research Papers Using New Era Syringe Pump Systems EI Positive Ion Spectra for Perfluorokerosene (PFK) Cap Liner Information How do I convert between fluid oz and milliliters? Which bottle material should I choose? Which bottle mouth should I choose? The Bottle Selection Guide CGA Connections for Gas Tanks Chemical Reaction Interface Mass Spectrometry (CRIMS)

- LiteratureApplication Notes Adsorbent Resins Guide Mass Spec Tips SDS Sheets FAQ MS Calibration Compound Spectra Manuals MS Links/Labs/ Organizations MS Online Tools Flyers on Products/Services Scientific Supplies Catalog About Us NextAdvance Bullet Blender® Homogenizer Protocols Micro-Mesh® Literature Instrumentation Literature Agilent GC/MS Literature SIS News / E-Mail Newsletter NIST MS Database - Update Notifications
- ▶
- Mass Spec Source Cleaning Procedures (This Page)
John J. Manura
Scientific Instrument Services
Finnigan 3200, HP5971 and HP5970 Sources
In Volume I of the Mass Spec Handbook of Service (Scientific Instrument Services, #MSHS-1, 1983), we published a series of articles on the cleaning of mass spectrometer sources and other mass spectrometer parts. These articles described a wide range of techniques and available equipment for the cleaning of metal parts, ceramics and other insulating materials. Over the last 10 years, we have refined several of these methods into our standard methodology for cleaning mass spectrometer sources. We have incorporated the techniques and equipment that will most efficiently clean these instrument parts. These techniques have been used to clean many sources in the mass spectrometers in our own facilities as well as sources for several customers. The following article describes the methodology used to clean and refurbish mass spectrometer sources in our repair facilities. As a result of requests by several of our customers, this new cleaning and refurbishing service for mass spectrometer sources is now being offered by Scientific Instrument Services.
Disassembly
Before cleaning, it is a common practice to completely disassemble the mass spec source. Because of the wide variety of metals and insulating materials, special handling and cleaning techniques are required for each type of material. After thoroughly noting the position of all parts as well as their orientation on the source, the parts are disassembled. If a manufacturers schematic or drawing is not available, one should be drawn either before disassembly or during the disassembly process. All the ceramics are collected in one small beaker and all the metal parts are set aside for further cleaning. Any Vespel® parts or other parts made of materials which will require special handling are placed in a separate beaker.
Cleaning Ceramics and Sapphire Insulators
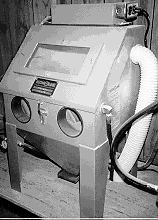
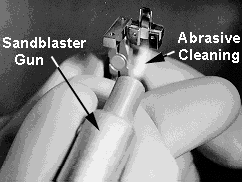
Miniblaster is used to clean filaments and source metal parts
Ceramics made from Macor or other soft machinable type ceramics can not be cleaned either by sandblasting or by baking out at high temperatures. These machinable ceramics are very soft and have low melting points. In most cases they can not be cleaned except by very low pressure sandblasting (10 p.s.i.) with glass beads abrasives using extreme care not to excessively abrade these materials. Other special ceramic insulators such as Beryllium oxide insulators should not be sandblasted due to the toxic nature of these materials. Graphite coated sliding insulators such as those used in the H.P. Engine cannot be sandblasted or cleaned by these abrasive techniques or the graphite coating will be removed, and the source parts will not slide as easily. Finally anodized aluminum insulators (such as those used in some Finnigan 4500 sources) cannot be sandblasted or the oxide insulating surface will be removed. Most of these special insulators can only be cleaned by washing in a methanol solvent, followed by baking out in a 100 degrees C oven.
The preferred method for cleaning alumina ceramics includes first sandblasting the ceramics using glass beads abrasives in a self contained sandblast cabinet. The glass beads will remove heavy buildups of charred organics on the surface of the ceramic. If glass beads abrasive will not remove the residue, then alumina abrasives can be used to remove this residue. However when using alumina abrasives, care must be used to avoid excessive sandblasting, otherwise the size and dimensions of the ceramic can be affected, because the alumina abrasive can actually abrade the alumina ceramic. After all carbon residue is removed, the abrasive dust is removed with an air stream. The ceramics are then quickly washed in an acetone wash and then placed on a ceramic insulating board. After the acetone has evaporated to dryness, the ceramics are either flamed with an acetylene torch until dull red in color, or placed into a muffle furnace at 600 to 800 degrees C. This method should thoroughly clean the ceramics. If the ceramics are still dirty or cracked, they should be replaced with new ceramic insulators. We prefer not to use acids for the cleaning of ceramics, in particular Dichromate solutions which tend to leave the ceramics with a green color residue which can never be removed.
Cleaning Vespel® Insulators
Care must be used in cleaning Vespel (brown colored) insulators which are used in many mass spectrometers. Solvents such as acetone should not be used, because this material may adsorb the solvent which will be hard to remove and might change the dimensions of the insulator. These Vespel insulators are normally cleaned by rinsing in Methanol, then drying and baking out in an oven at 100 to 150 degrees C for one hour. If black organic residues or other heavy contaminate buildup is present, the Vespel parts can be lightly sandblasted using glass beads at low sandblasting pressures. After which, any abrasive residue should be thoroughly removed and the parts baked out in an oven at 100 to 150 degrees C. If this procedure does not clean these Vespel parts, they will need to be replaced.
Cleaning Metal Parts
The following methods are suitable for most stainless steel metal parts. Other materials including gold plated metal parts should not be cleaned via these techniques. The following techniques are abrasive and will remove excessive amounts of soft metals as well as electroplated surfaces. Gold plated parts should be cleaned by solvent rinsing followed by baking out in an oven at 100 to 200 degrees C.
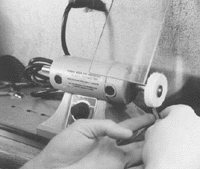
Using a Foredom Grinding/Polishing Wheel to Clean metal parts
We have used the following procedure for more than 20 years to clean both metal source parts and well as metal filament parts. Parts that contain a heavy buildup of organic deposits are lightly sandblasted using glass beads abrasive. Care must be taken to use the lowest sandblast pressure that will effectively remove the carbon residue while removing minimum metal surface. Areas around slits and other critical edges should not be sandblasted. Normally the only part of the source that may need sandblasting is around the filament entrance hole and at the collector plate, and even these areas are only sandblasted when the polishing step described below will not easily remove the residues. The best method for cleaning the metal parts is to use a motor tool such as a Dremel Tool or a Foredom Motor Tool using felt bobs (buffing wheels) and a fine polishing abrasive such as polishing rouge. Using these tools and the wide variety of shapes and diameters of buffing bobs, can easily clean most areas of the mass spec sources. The buffing bobs are loaded with the abrasive rouge and the metal parts buffed until all residues are removed. Using this technique, one can readily obtain a highly polished metal surface over the entire mass spec source. This may require a little time (one to two hours) the first time the source is cleaned, but subsequent cleanings become easier. This is because, once the mass spec source has a polished metal surface, the surface will stay cleaner longer due to the lack of small scratches or rough surface onto which contaminants can attach. When cleaning around slits and other critical edges, use care so as not to round edges or distort the surfaces. The small diameter and pointed tip bobs can be used to polish into corners and the small crevices in the source parts. In addition cotton tipped swabs can be coated with the polishing rouge and used by hand to clean these small crevices and corners.

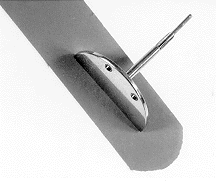
Micromesh Abrasives are ideal for cleaning source parts such as the slit above
Micromesh abrasives can also be used to clean the mass spec source. The use of Micromesh for cleaning instrument parts is fully describe in the article on Micromesh Abrasive Sheets. This series of abrasives works very well on the cleaning of large flat surfaces, such as slits and lenses. However it is difficult to use Micromesh on corners and in tight crevices. When using the Micromesh products, begin by using the finest abrasive which will remove the residue on the source, normally 3200 grit (in difficult cases 1800). Then consecutively use the next finer grit down to 12000 until the metal surface has a fine polished appearance. A polished metal surface equivalent to buffing can be obtained using Micromesh abrasives. The Micromesh abrasives are particularly good for removing stubborn charred residues from around electron ion entrance holes on the source block and on the ion beam collector plates. This product is especially good at removing scratches from metal surfaces (such as probe rods) to produce a mirror like finish on all metal surfaces.
After all metal surfaces have been cleaned by one or both of the above abrasive steps, they must be cleaned to remove all abrasive and polishing compound from the surface. Begin by placing the metal parts in a beaker into which is added the commercial detergent "Mr. Clean" diluted 1:4 with water. "Mr Clean" has proven to be an effective cleaner for the removal of the polishing compound residues. In addition it thoroughly rinses from the metal surface with subsequent rinses of water leaving no residues. Place this beaker with parts, into an ultrasonic cleaner and agitate for 10 to 20 minutes. This should thoroughly remove all the polishing compound from the metal parts. Decant off the cleaning solution, and repeat the above agitation with 4 or 5 consecutive washes with clean water to remove all traces of the cleaning solvent. After the parts are thoroughly rinsed, decant off all the water from the parts and rinse all parts in a rinse of Acetone followed by a rinse in Methanol. For best results these rinses with solvents can be done in an ultrasonic cleaner. Following the rinses, all parts should be left to air dry and then placed into an oven at 100 to 150 degrees C for one hour.
Filament Repair
One of the setups at SIS for Filament Repair
Filaments returned with sources are cleaned and repaired in our shop facilities using techniques and methods perfected over the last 20 years. These methods have been outlined in the Mass Spec Handbook of Service and in the SIS newsletters.
Reassembly
HP 5988, HP5989 and VG TRIO Sources
After all parts have been cleaned and baked out, they should only be touched using lint free gloves. After all parts are clean, the mass spec source is reassembled. When assembling the source, double check all parts for correct positioning and alignment. After assembly, check all parts with an ohmmeter to make sure that lenses, slits and collectors are electrically isolated from the main source block. It is also best to attach the filament at this time.
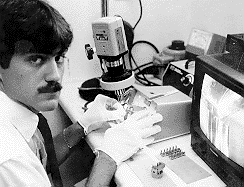
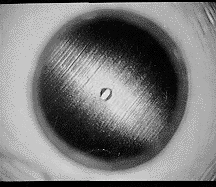
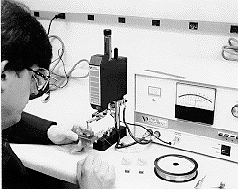
Using video system to align filament over ion entrance hole in mass spec source
By installing the filament while the source is easily accessible, one can more accurately position the filament so as to align the filament directly over the ion entrance hole in the source filament block. Often this can be done with the collector plate removed, thereby permitting the alignment of the filament by viewing the filament through the collector slit and ion entrance hole from the collector side of the source. In our facilities we have an optical video microscope system. This system has a 1.0 inch depth of field at 20X and permits us to accurately align the filament from the collector side of the source. This will assure the optimum performance of the mass spectrometer.