- ▶
- Heaters/Source
- ▶
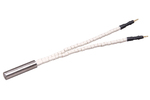
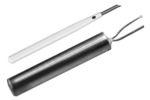
- Agilent Heaters and SensorsMass Spectrometry, Scientific Supplies & ManufacturingScientific Instrument Services 5973 Source Heater Tamper Resistant Allen Wrench 5973/5975 Quad Sensor 5985 Source Heater Assembly Agilent Interface Heater Assembly 5971 Interface Heater
- ▶
- MS Instrument Cleaning Supplies
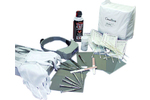
- Lab/CleanMicro-Mesh® (Fine Cushioned Abrasive) Aluminum Oxide Cleaning Abrasive Fiberglass Cleaning Brushes Swabs and Applicators Nylon and Latex Gloves Cleaning Wipes SIS MS Source Cleaning Kits Dust-Off® Hurricane Canless Air System Wheaton Bottles Wheaton Vials Wheaton Closures Sterile Vials - Bottle, Stopper, and Cap - All Together Certified Sterile Kimble Chase Clear Serum Vials Soil Sampling Kits Crimpers and Decappers Temperature Measurement & Recording Devices Bullet Blender® Homogenizer The SW 110 Multi-Purpose Spot Welder New Era Syringe Pump Systems Ohaus MB Series Moisture Analyzers Celestron® Handheld Digital Microscope (HDM) Checkit® Pipette Accuracy Test Greenwood Lab Supplies Next Advance Lab Products Catalog Page G1

- ▶
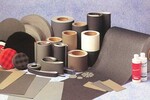
- Micro-Mesh®Sheets Rolls Discs Pads Nail Files Tufbuf Micro-Gloss Tape Belts Sanding Swabs Polishing Tool Quick-Shine Buffers Kits - Plastic (power) Kits - Plastic (hand) Kits - Craftsman, Wood, Metal Kits - Automotive & Headlight Restoration Kits Kits - Aircraft Window Reference - Grit Size Reference - MSDS Sheets, Brochures, Instructions, Kits Print Catalog - Micro-Mesh Catalog Page A63 Catalog Page A64 Catalog Page A65 Catalog Page A66 Catalog Page G3 Catalog Page G4 Catalog Page G5 Catalog Page G6 Catalog Page G7 Catalog Page G8
- LiteratureApplication Notes Adsorbent Resins Guide Mass Spec Tips SDS Sheets FAQ MS Calibration Compound Spectra Manuals MS Links/Labs/ Organizations MS Online Tools Flyers on Products/Services Scientific Supplies Catalog About Us NextAdvance Bullet Blender® Homogenizer Protocols Micro-Mesh® Literature Instrumentation Literature Agilent GC/MS Literature SIS News / E-Mail Newsletter NIST MS Database - Update Notifications

- ▶
- Reference - MSDS Sheets, Brochures, Instructions, KitsMicro-Mesh Regular - Description of Micro-Mesh Regular Micro-Mesh MX - Description of Micro-Mesh MX for Metal Finishing Benefits of Micro-Mesh - What Makes Micro-Mesh So Special Ergonomic Benefits of Micro-Mesh - Human Factors, Engineering and Micro-Mesh TufBuf Polishing Pads - Polishing and Buffing Pads Guidelines for Acrylic Finishing Guideline for Making Belts with Micro-Mesh Micro-Gloss Instructions Metal Finishing with Micro-Mesh Random Orbital sanding with Micro-Mesh Solid Surface Finishing with Micro-Mesh Urethane Coating rectification Procedures Wood Finishing Procedures with Micro-Mesh Micro-Mesh Grit Size Conversion Chart Aquarium Restorer Kit Instructions Belt Finishing with Micro-Mesh Burn Kit Instructions Clear Seas Acrylic Kit Instructions Clear Seas Vinyl Kit Instructions Craft Kit Instructions Heavy Damage Removal Kit Instructions Light Damage Removal Kit Instructions KR-70 Acrylic Restoration Kit Instructions Maintenance Kit Instructions Micro-Mesh Anti-Static Cream Final Finish Micro-Finish Micro-Gloss Micro-Gloss # 5 TufBuf Polishing Pad
- ▶
- Guidelines for Acrylic Finishing (This Page)
Recommended procedures and guidlines for the refinishing of acrylic plastics
To avoid scratching the surface, do not wear watches, rings, or bracelets. Long fingernails should be covered with gloves.
MICRO-MESH® will remove surface discoloration, but not tinting that is throughout the plastic. If unsure, test in a small inconspicuous area.
Keep MICRO-MESH clean; contamination can cause scratches. When restoral is complete, rinse MICRO-MESH pieces, air dry, and return them to their original packaging. MICRO-MESH is reusable!
Use only 100% cotton flannel for wiping. Keep it clean, wash in warm soapy water, rinse, dry and return to the kit box.
Wrap MICRO-MESH or conventional sandpaper tightly around foam block and hold in palm of hand. Sanding without a block will produce a rippled or distorted surface.
MICRO-MESH is numerically graded. The higher the number, the finer the cutting action.
Do not work in a circular pattern. Cross your sanding pattern at 90 degree angles from one step to the next, to be sure of total removal of previous sanding pattern. Incomplete removal will result in an incomplete restoral! Damage not removed with the beginning step will most likely remain after the process is complete.
To remove heavy damage from highly curved surfaces, it may be beneficial to sand in an alternating pattern of diagonally, horizontally and vertically, in a straight line motion. This will assist in achieving an even removal of material over the entire surface.
Thin plastic (1/8" or less) may develop surface distortion if sanding the surface creates heat. Work the surface slowly and work wet.
Check your scratch pattern frequently. It is helpful to set a bright light on the side opposite your restoral side. For better viewing on non-transparent surfaces, place the light at an angle.
DISTORTION
It is always easier to prevent distortion than to remove it! There are two types of distortion that can be caused by the use of improper restoral methods, localized and surface. Localized distortion is caused by working one small spot and not blending the damage removal over a large enough area.
Surface distortion is almost always a sign of incomplete restoration. This could be the result of:
1. the incomplete removal of one sanding pattern before proceeding to the next step
2. not working a larger area with each new step
3. heat build-up
4. skipping steps
5. not cleaning the surface between steps