- ▶
- Heaters/Source
- ▶
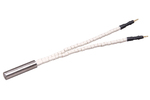
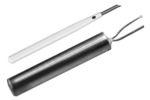
- Agilent Heaters and SensorsMass Spectrometry, Scientific Supplies & ManufacturingScientific Instrument Services 5973 Source Heater Tamper Resistant Allen Wrench 5973/5975 Quad Sensor 5985 Source Heater Assembly Agilent Interface Heater Assembly 5971 Interface Heater
- ▶
- MS Instrument Cleaning Supplies
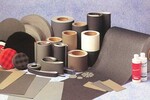
- Lab/CleanMicro-Mesh® (Fine Cushioned Abrasive) Aluminum Oxide Cleaning Abrasive Fiberglass Cleaning Brushes Swabs and Applicators Nylon and Latex Gloves Cleaning Wipes SIS MS Source Cleaning Kits Dust-Off® Hurricane Canless Air System Wheaton Bottles Wheaton Vials Wheaton Closures Sterile Vials - Bottle, Stopper, and Cap - All Together Certified Sterile Kimble Chase Clear Serum Vials Soil Sampling Kits Crimpers and Decappers Temperature Measurement & Recording Devices Bullet Blender® Homogenizer The SW 110 Multi-Purpose Spot Welder New Era Syringe Pump Systems Ohaus MB Series Moisture Analyzers Celestron® Handheld Digital Microscope (HDM) Checkit® Pipette Accuracy Test Greenwood Lab Supplies Next Advance Lab Products Catalog Page G1

- ▶
- Micro-Mesh®Sheets Rolls Discs Pads Nail Files Tufbuf Micro-Gloss Tape Belts Sanding Swabs Polishing Tool Quick-Shine Buffers Kits - Plastic (power) Kits - Plastic (hand) Kits - Craftsman, Wood, Metal Kits - Automotive & Headlight Restoration Kits Kits - Aircraft Window Reference - Grit Size Reference - MSDS Sheets, Brochures, Instructions, Kits Print Catalog - Micro-Mesh Catalog Page A63 Catalog Page A64 Catalog Page A65 Catalog Page A66 Catalog Page G3 Catalog Page G4 Catalog Page G5 Catalog Page G6 Catalog Page G7 Catalog Page G8
- LiteratureApplication Notes Adsorbent Resins Guide Mass Spec Tips SDS Sheets FAQ MS Calibration Compound Spectra Manuals MS Links/Labs/ Organizations MS Online Tools Flyers on Products/Services Scientific Supplies Catalog About Us NextAdvance Bullet Blender® Homogenizer Protocols Micro-Mesh® Literature Instrumentation Literature Agilent GC/MS Literature SIS News / E-Mail Newsletter NIST MS Database - Update Notifications

- ▶
- Reference - MSDS Sheets, Brochures, Instructions, KitsMicro-Mesh Regular - Description of Micro-Mesh Regular Micro-Mesh MX - Description of Micro-Mesh MX for Metal Finishing Benefits of Micro-Mesh - What Makes Micro-Mesh So Special Ergonomic Benefits of Micro-Mesh - Human Factors, Engineering and Micro-Mesh TufBuf Polishing Pads - Polishing and Buffing Pads Guidelines for Acrylic Finishing Guideline for Making Belts with Micro-Mesh Micro-Gloss Instructions Metal Finishing with Micro-Mesh Random Orbital sanding with Micro-Mesh Solid Surface Finishing with Micro-Mesh Urethane Coating rectification Procedures Wood Finishing Procedures with Micro-Mesh Micro-Mesh Grit Size Conversion Chart Aquarium Restorer Kit Instructions Belt Finishing with Micro-Mesh Burn Kit Instructions Clear Seas Acrylic Kit Instructions Clear Seas Vinyl Kit Instructions Craft Kit Instructions Heavy Damage Removal Kit Instructions Light Damage Removal Kit Instructions KR-70 Acrylic Restoration Kit Instructions Maintenance Kit Instructions Micro-Mesh Anti-Static Cream Final Finish Micro-Finish Micro-Gloss Micro-Gloss # 5 TufBuf Polishing Pad
- ▶
- Solid Surface Finishing with Micro-Mesh (This Page)
Tools Required
- Random Orbital Sander
- Micro-Mesh® Aluminum Oxide Discs
(Discs are available in any size, hole pattern and backing)
Finishing Step Guidelines
Deep Scratch Removal: 300 AO
Matte Finish: 300 AO, 600 AO
Satin Finish: 300 AO, 600 AO, 800 AO, 1500 AO
Gloss Finish: 300 AO, 600 AO, 800 AO, 1500 AO, 2400 AO, 4000 AO
High Gloss Finish: 300 AO, 600 AO, 800 AO, 1500 AO, 2400 AO, 4000 AO, 12000 AO
Note: not everyone's idea of a particular finish is the same. Depending on the color and type of solid surface, fewer or more steps may be required in order to achieve the look you want. It is a good idea to check the finish between grades until you become familiar with using Micro-Mesh.
When used properly Micro-Mesh discs will provide you with the best finish imaginable. No special tools are required and you will be able to achieve a matte to a high gloss finish without the use of water or buffing compounds making them not only perfect for a shop environment, but excellent for on-site repairs. Engineered to effortlessly glide across the material, Micro-Mesh greatly reduces the amount of fatigue that fabricators would normally endure while sanding. With Micro-Mesh there is less heat generation so you won't have to worry about burning the material.
Helpful Hints
1. Light pressure should be used to control sander. The sander should be moved in a random pattern, or in circular motion to "blend" the scratch pattern. We suggest alternating a North/South, East/West pattern, covering the entire surface.
2. The sander should be in contact width the surface before it is turned on. Remove the sander from the surface prior to turning the sander off.
3. Micro-Mesh can be used wet or dry and is reuseable. Simply rinse out the discs and allow to dry.
4. The beginning condition of the solid surface material will determine your starting point. Follow the first step until all of the beginning damage is removed. Make certain to wipe away any sanding debris prior to continuing on with the next step to avoid contamination scratches. Also check the scratch pattern left to make certain that the surface was completely sanded.
5. Each additional step should be used for approximately 1-2 minutes per square foot or until the previous scratch pattern is completely removed. Gloss finishes may require additional time.
Trouble Shooting
Swirl marks in the finish: do not skip steps. Spend approximately the same anount of time on each step. Be sure to completely remove sanding residue before moving on to the next step. Move the sander in a consistent pattern. Apply less pressure - excessive pressure will change the orbit of the sander causing "fish hooks" in the finish.
Finish not glossy enough: for Micro-Mesh grades 300 AO thru 1500 AO use a standard back-up pad. Change to a soft back-up pad for grades 2400 AO thru 12000 AO.
Finish not matte enough: use a firm back-up pad.
Milky/Hazy appearance: repeat the last step using a spritz of water.
Home owner can't maintain finish: Micro-Mesh Soft Touch Pads are available in any grade or combination of grades. Leave with the home owner so they can feather out scuffs and light surface scratches.
If the finish you desire is not obtained, please contact Micro-Surface Finishing Products Inc. at 800-225-3006 or 563-732-3240 for assistance.
06/01/02 - Solid Surface