- ▶
- Heaters/Source
- ▶
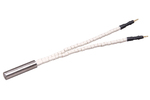
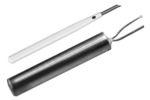
- Agilent Heaters and SensorsMass Spectrometry, Scientific Supplies & ManufacturingScientific Instrument Services 5973 Source Heater Tamper Resistant Allen Wrench 5973/5975 Quad Sensor 5985 Source Heater Assembly Agilent Interface Heater Assembly 5971 Interface Heater
- ▶
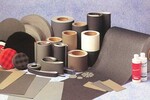
- MS Instrument Cleaning Supplies
- Lab/CleanMicro-Mesh® (Fine Cushioned Abrasive) Aluminum Oxide Cleaning Abrasive Fiberglass Cleaning Brushes Swabs and Applicators Nylon and Latex Gloves Cleaning Wipes SIS MS Source Cleaning Kits Dust-Off® Hurricane Canless Air System Wheaton Bottles Wheaton Vials Wheaton Closures Sterile Vials - Bottle, Stopper, and Cap - All Together Certified Sterile Kimble Chase Clear Serum Vials Soil Sampling Kits Crimpers and Decappers Temperature Measurement & Recording Devices Bullet Blender® Homogenizer The SW 110 Multi-Purpose Spot Welder New Era Syringe Pump Systems Ohaus MB Series Moisture Analyzers Celestron® Handheld Digital Microscope (HDM) Checkit® Pipette Accuracy Test Greenwood Lab Supplies Next Advance Lab Products Catalog Page G1

- ▶
- Micro-Mesh®Sheets Rolls Discs Pads Nail Files Tufbuf Micro-Gloss Tape Belts Sanding Swabs Polishing Tool Quick-Shine Buffers Kits - Plastic (power) Kits - Plastic (hand) Kits - Craftsman, Wood, Metal Kits - Automotive & Headlight Restoration Kits Kits - Aircraft Window Reference - Grit Size Reference - MSDS Sheets, Brochures, Instructions, Kits Print Catalog - Micro-Mesh Catalog Page A63 Catalog Page A64 Catalog Page A65 Catalog Page A66 Catalog Page G3 Catalog Page G4 Catalog Page G5 Catalog Page G6 Catalog Page G7 Catalog Page G8
- LiteratureApplication Notes Adsorbent Resins Guide Mass Spec Tips SDS Sheets FAQ MS Calibration Compound Spectra Manuals MS Links/Labs/ Organizations MS Online Tools Flyers on Products/Services Scientific Supplies Catalog About Us NextAdvance Bullet Blender® Homogenizer Protocols Micro-Mesh® Literature Instrumentation Literature Agilent GC/MS Literature SIS News / E-Mail Newsletter NIST MS Database - Update Notifications

- ▶
- Reference - MSDS Sheets, Brochures, Instructions, KitsMicro-Mesh Regular - Description of Micro-Mesh Regular Micro-Mesh MX - Description of Micro-Mesh MX for Metal Finishing Benefits of Micro-Mesh - What Makes Micro-Mesh So Special Ergonomic Benefits of Micro-Mesh - Human Factors, Engineering and Micro-Mesh TufBuf Polishing Pads - Polishing and Buffing Pads Guidelines for Acrylic Finishing Guideline for Making Belts with Micro-Mesh Micro-Gloss Instructions Metal Finishing with Micro-Mesh Random Orbital sanding with Micro-Mesh Solid Surface Finishing with Micro-Mesh Urethane Coating rectification Procedures Wood Finishing Procedures with Micro-Mesh Micro-Mesh Grit Size Conversion Chart Aquarium Restorer Kit Instructions Belt Finishing with Micro-Mesh Burn Kit Instructions Clear Seas Acrylic Kit Instructions Clear Seas Vinyl Kit Instructions Craft Kit Instructions Heavy Damage Removal Kit Instructions Light Damage Removal Kit Instructions KR-70 Acrylic Restoration Kit Instructions Maintenance Kit Instructions Micro-Mesh Anti-Static Cream Final Finish Micro-Finish Micro-Gloss Micro-Gloss # 5 TufBuf Polishing Pad
- ▶
- KR-70 Acrylic Restoration Kit Instructions (This Page)
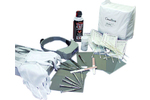
List of Contents:
Micro-Mesh® 3" x 6" sheets: 1500, 1800, 2400, 3600, 4000, 6000, foam block, Micro-Gloss and 2 cotton flannel wipes (sandpaper is not included in this kit).
Determine Type and Extent of Damage and Starting Point
- Crazing - A series of very fine lines, stars, or haze when viewed at an angle in bright light. Crazing is below the surface and usually cannot be felt with the fingernail. Requires aggressive sanding to remove. Begin with 220 grit wet/dry sandpaper.
- Deep Scratches - Easily felt with the fingertip Begin with 220 grit wet/dry sandpaper.
- Minor Scratches - Readily detected with fingernail. Begin with 1500 Micro-Mesh. If the scratch is not easily removed use 400 wet/dry sandpaper followed by Micro-Mesh 1500.
- Hairline Scratches & Light Scuffs - Light scratches and hazing - Begin with 2400 or 3600 Micro-Mesh
- Very Fine Scratches - Usually caused by improper cleaning methods. Begin with 4000 or 6000 Micro-Mesh.
Crazing is the most common and objectionable problem with regards to aircraft transparencies. It appears to be scratches, either large or small, which when highlighted by the sun show up as bright lines. In reality they are shallow fractures just under the surface layer. Crazing can be classified in two categories, minor and severe. Minor crazing has the appearance of thousands of tiny scratches on the surface. When viewed at an angle to the sun or a bright light, they look like a network of very fine shiny lines, stars or haze. Severe crazing, on the other hand has fewer scratches, but they are much larger and appear to be deep gouges in the surface. In both cases it is rare that these can be felt with the fingernail - they are UNDER the surface. This will be the hardest type of damage to remove. Deep crazing will require sandpaper, possibly as coarse as 120 grit. Crazing removal will take time. An equal amount of material must be removed from the entire surface to prevent distortion. THIS MUCH STOCK REMOVAL CAN ONLY BE DONE WITH SANDPAPER. DO NOT BE AFRAID TO USE SANDPAPER ON YOUR TRANSPARENCY! After damage removal and completion of the sandpaper sequence, the cloudy appearance will be removed as you continue with the Micro-Mesh procedure.
Step 1 - Damage Removal
Most of the restoral time is spent actually removing the degraded acrylic material. Take your time and make sure that this first step removes all of the damaged material. THIS IS ESSENTIAL! Time required for this step may take 70% of the total restoral process.
1. Determine the type and extent of damage and determine your starting abrasive grade. Open coat sandpaper must be used dry. Wet/dry sandpaper and Micro-Mesh can be used wet or dry, but best results are obtained if used wet. This will also help keep the surface cool and the abrasive flushed free of abraded particles. Clean fresh water is an excellent lubricant and coolant for Micro-Mesh. Water may be sprayed or misted on the surface with a spray bottle or Micro-Mesh may be dipped in fresh water occasionally during use. A drop of mild dish detergent can be added to water for lubrication if needed.
2. Once the starting abrasive grade has been determined, wrap the abrasive tightly around the foam block. Using firm essure, sand evenly over the entire area in a vertical motion, until the damaged layer has been totally removed. This damage removal step is CRITICAL! If it is incomplete, the final results will not be satisfactory. After 3-5 minutes check your progress. If it seems the damage is not being removed at an acceptable rate, you may want to proceed to a coarser grade of abrasive. In the case of crazing, the time needed to remove the damage will be longer. Since more material will be removed to eliminate damage, you may want to alternate with vertical and horizontal straight line motion. Once the damage has been removed, end with a vertical sanding pattern. DO NOT SAND IN A CIRCULAR PATTERN. Spot sanding in a localized area is not recommended. To remove a single scratch or small scratch area, sand in an area large enough (8" x 8") to prevent waviness or distortion. Work across the damaged area 4 to 5 inches each way from the damage. This may mean sanding the entire surface. Work an area slightly larger (at least 2 inches) with each consecutive step. You may find you are sanding the entire surface before you are finished.
3. Clean the surface by flushing with water, or blowing with air. This will prevent abraded particles from being picked up with the next abrasive step and causing scratches.
4. Proceed to the next step of abrasive. If sandpaper was used, it will be necessary to continue through all of the grades listed to 400 grit sandpaper before beginning with the Micro-Mesh abrasives. Wrap the abrasive around the foam block and sand at a 90° angle from the previous step. Continue sanding until the previous sanding pattern has been completely removed. The approximate time for each step is 3
5 minutes per square foot. If water is being used, it will be necessary to dry the surface completely to determine that the previous pattern ahs been removed. The use of 100% cotton flannel is recommended. Avoid synthetics and paper towels, as these both tend to cause scratches in plastic.
Step Two - Surface Restoral
1. After the surface has been sanded with 400 grit sandpaper, begin with the Micro-Mesh abrasives. Wrap the 1500 around the foam block, and sand at a 90° angle from the previous sanding pattern. Continue until the previous pattern is again removed.
2. Proceed as above through all grades of Micro-Mesh included in the kit. Be sure to change the sanding direction 90° with each step and check for total removal of each scratch pattern. If coarser scratches remain at any step, they will probably still be visible at the end leaving an incomplete restoral and a hazy finish.
3. When you have finished with the final step of the Micro-Mesh series, and are satisfied with the surface appearance, clean the surface thoroughly.
4. Once the surface has been sufficiently cleaned, flush with water. Using one of the flannel cloths included in this kit, wipe the window. Rinse the flannel, and wrap around the foam block. Apply a dime size drop of Micro-Gloss to the flannel. Rub briskly over a square foot area. Work in a straight line pattern. Use a firm pressure for 1 to 2 minutes, until Micro-Gloss has almost disappeared. Water may be added to extend working time. Continue in 1 foot areas, overlapping slightly until entire surface has been worked. Flush with water and wipe entire surface clean and dry with the second flannel cloth.
Note: Keep the flannel clean and you can use it many times. Rinsing is needed to remove dirt and abrasive particles that are trapped in the flannel.
06/01/02 - kr70 instructions